CodeStarでAlexaスキルを管理する
CodeStarでのデプロイ管理が便利になっていたので触りました。 CodeStarでプロジェクトを始める 始め方については、別ブログで書いていますのでこちらをご覧ください。最近[Link to Amazon Devel […]
目次
CodeStarでのデプロイ管理が便利になっていたので触りました。
CodeStarでプロジェクトを始める
始め方については、別ブログで書いていますのでこちらをご覧ください。最近[Link to Amazon Developer Account]という項目が追加されまして、こちらでAmazon Developer アカウントとリンクすることができます。

Cloud9を起動する
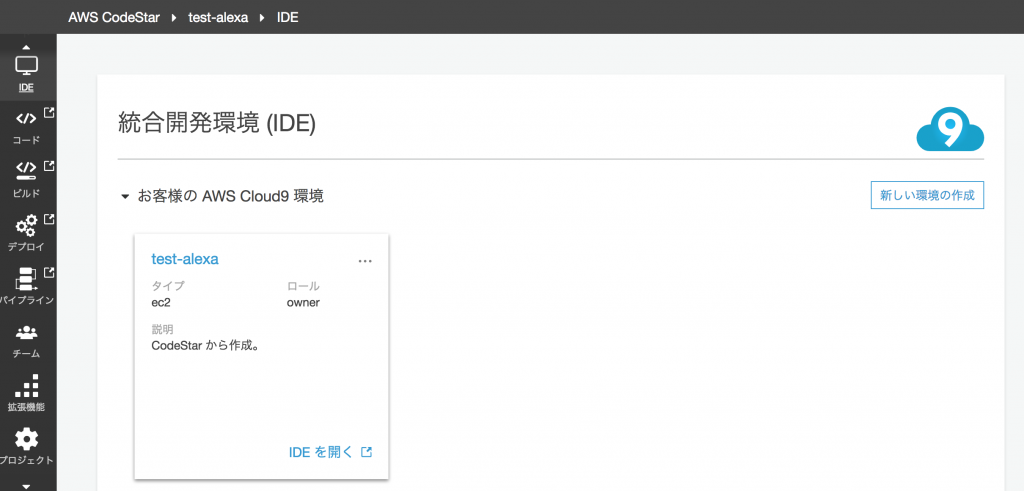
CodeStarでIDEをCloud9にすることで、ブラウザ上から編集できます。[IDE] > [IDEを開く]からCloud9を開きましょう。

エディタを開くと以下のような構成になっています。ちなみにいつのまにかAlexa SDKからASK SDKにアップデートされていました。

スキル情報を編集する
せっかくなので、スキル情報を変えてみましょう。skill.jsonを開いて名前などを変えておきます。
{
  "manifest": {
    "publishingInformation": {
      "locales": {
        "en-US": {
          "summary": "Example skill made by code star",
          "examplePhrases": [
            "Alexa open code star",
            "Alexa tell code star hello",
            "Alexa ask code star say hello"
          ],
          "name": "Hello from Code Star",
          "description": "Example skill made by code star"
        }
      },
      "isAvailableWorldwide": true,
      "testingInstructions": "Sample Testing Instructions.",
      "category": "EDUCATION_AND_REFERENCE",
      "distributionCountries": []
    },
    "apis": {
      "custom": {
      }
    },
    "manifestVersion": "1.0"
  }
}
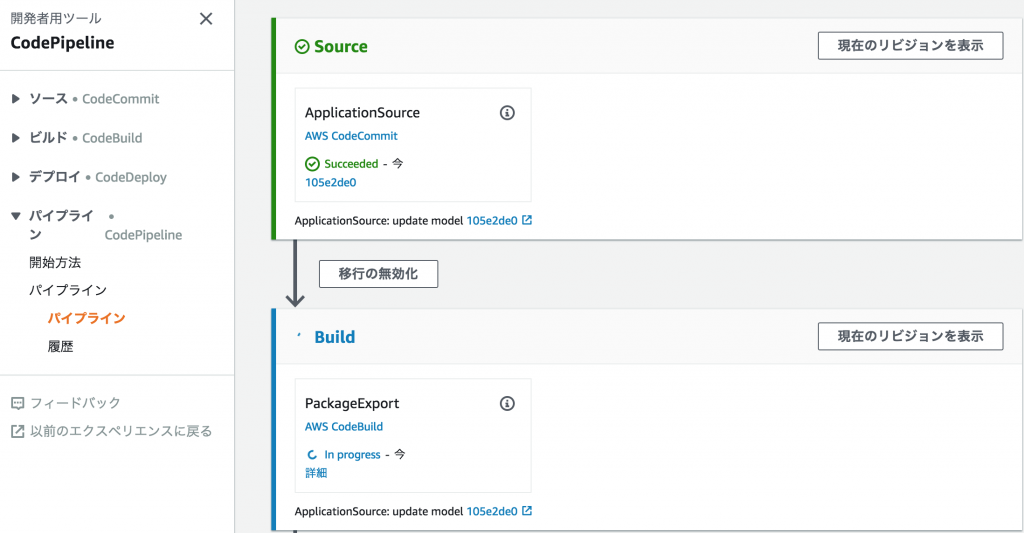
この状態でGitにコミットとpushをします。するとCodeStarが用意したCodePipelineが自動でデプロイしてくれます。

日本語を追加する
せっかくなので、日本語の対話モデルも足してみましょう。まずskill.jsonに日本語情報を追加します。
{
  "manifest": {
    "publishingInformation": {
      "locales": {
        "en-US": {
          "summary": "Example skill made by code star",
          "examplePhrases": [
            "Alexa open code star",
            "Alexa tell code star hello",
            "Alexa ask code star say hello"
          ],
          "name": "Hello from Code Star",
          "description": "Example skill made by code star"
        },
        "ja-JP": {
          "summary": "コードスターサンプルスキル",
          "examplePhrases": [
            "Alexa コードスターを開いて",
            "Alexa コードスター",
            "Alexa コードスターでこんにちは"
          ],
          "name": "コードスター",
          "description": "コードスターサンプルスキル"
        }
      },
      "isAvailableWorldwide": true,
      "testingInstructions": "Sample Testing Instructions.",
      "category": "EDUCATION_AND_REFERENCE",
      "distributionCountries": []
    },
    "apis": {
      "custom": {
      }
    },
    "manifestVersion": "1.0"
  }
}
続いてinteractionModels/custom/ja-JP.jsonを作成します。
{
    "interactionModel": {
        "languageModel": {
            "invocationName": "コードスター",
            "intents": [
                {
                    "name": "AMAZON.CancelIntent",
                    "samples": []
                },
                {
                    "name": "AMAZON.HelpIntent",
                    "samples": []
                },
                {
                    "name": "AMAZON.StopIntent",
                    "samples": []
                },
                {
                    "name": "HelloWorldIntent",
                    "slots": [],
                    "samples": [
                        "こんにちは"
                    ]
                }
            ],
            "types": []
        }
    }
}
再びGitでコミットとpushを行うことで、再び自動デプロイが走ります。

ビルド内容を変更する
webpackやTypeScriptなどを追加したい場合、buildspec.ymlにコマンドを追加しましょう。aws cloudformation packageでパッケージが作られるので、その前に実行する必要があります。
version: 0.2

phases:
  build:
    commands:
      - pip install --upgrade awscli
      - npm install --prefix lambda/custom/
      - aws cloudformation package --template cfn-template.yml --s3-bucket $S3_BUCKET --output-template cfn-packaged-template.yml
      # Do not remove this statement. This command is required for AWS CodeStar projects.
      # Update the AWS Partition, AWS Region, account ID and project ID in the project ARN on template-configuration.json file so AWS CloudFormation can tag project resources.
      - sed -i.bak 's/\$PARTITION\$/'${PARTITION}'/g;s/\$AWS_REGION\$/'${AWS_REGION}'/g;s/\$ACCOUNT_ID\$/'${ACCOUNT_ID}'/g;s/\$PROJECT_ID\$/'${PROJECT_ID}'/g' template-configuration.json

artifacts:
  type: zip
  files:
    - cfn-packaged-template.yml
    - template-configuration.json
DynamoDBなどのリソースを追加する
こちらはcfn-template.ymlを変更すると良さそうです。Lambdaのロールなどもこちらですね。
AWSTemplateFormatVersion: 2010-09-09
Transform:
- AWS::Serverless-2016-10-31
- AWS::CodeStar

Parameters:
  ProjectId:
    Type: String
    Description: AWS CodeStar project ID.
  CodeDeployRole:
    Type: String
    Description: IAM role to allow AWS CodeDeploy to manage deployment of AWS Lambda functions
  Stage:
    Type: String
    Description: The name for a project pipeline stage, such as Staging or Prod, for which resources are provisioned and deployed.
    Default: ''

Globals:
  Function:
    AutoPublishAlias: live
    DeploymentPreference:
      Enabled: true
      Type: Canary10Percent5Minutes
      Role: !Ref CodeDeployRole

Resources:
  CustomDefaultFunction:
    Type: AWS::Serverless::Function
    Properties:
      CodeUri: 'lambda/custom'
      Handler: index.handler
      Runtime: nodejs8.10
      Role: !GetAtt LambdaExecutionRole.Arn
      Events:
        AlexaSkillEvent:
          Type: AlexaSkill
  LambdaExecutionRole:
    Description: Creating service role in IAM for AWS Lambda
    Type: AWS::IAM::Role
    Properties:
      RoleName: !Sub 'CodeStar-${ProjectId}-Execution${Stage}'
      AssumeRolePolicyDocument:
        Statement:
        - Effect: Allow
          Principal:
            Service: [lambda.amazonaws.com]
          Action: sts:AssumeRole
      Path: /
      ManagedPolicyArns:
        -  arn:aws:iam::aws:policy/service-role/AWSLambdaBasicExecutionRole
      PermissionsBoundary: !Sub 'arn:${AWS::Partition}:iam::${AWS::AccountId}:policy/CodeStar_${ProjectId}_PermissionsBoundary'

Outputs:
  overrides:
      Value: !Sub |-
        {
          "manifest": {
            "apis": {
              "custom": {
                "endpoint": {
                  "uri": "${CustomDefaultFunction.Alias}"
                }
              }
            }
          }
        }
終わりに
Serverless FWやSAMとASK CLIの併用よりは、こちらの方がオールインワンで管理できて良さそうです。
VS Codeのスニペットが欲しいので、Cloud9はあまり使わないかもですが、チーム開発時やワークショップではよさそうです。